
This gluten-free pound cake is buttery, moist and lemony. It is also very easy to create. Above all, this gluten-free cake is optionally dairy free.
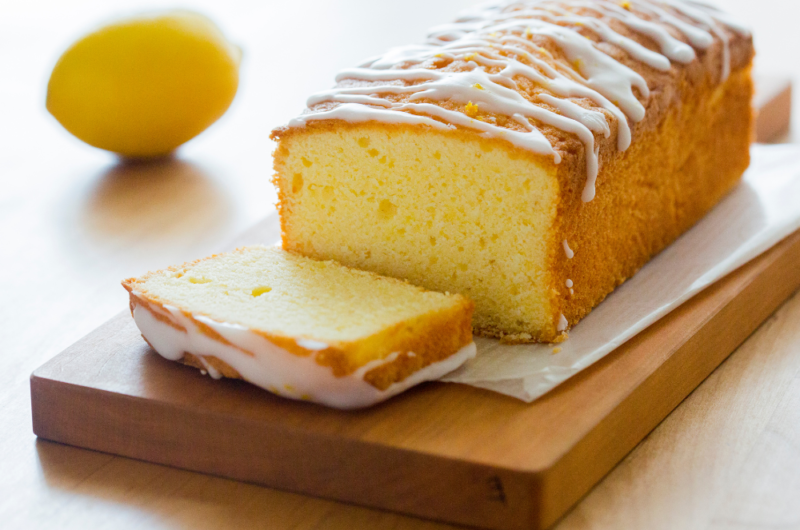
Jump to Recipe Print RecipeThe pound cake is irresistibly soft with a luscious glaze over it. It also has a very rich buttery taste with a hint of lemon.
After receiving numerous requests, I am glad to finally share this recipe. Without a doubt, my gluten free pound cake is incredibly easy to prepare and so soft it yields to the gentle touch of the spoon.
And the best part? The sugar glaze enhances the flavors of the cake tremendously. No one will believe it is gluten free! The cake is not only better for you, but has a hint of lemon to balance the flavor, and a buttery richness to soften it. The sweet zest of the glaze gives the cake a tangy kick that makes it one of a kind.
How to Make Gluten-Free Lemon Pound Cake
Pound cake is traditionally very rich and, at times, unbelievably dense because it uses butter, sugar, flour, and eggs in equal proportions. This recipe for Gluten-Free Lemon Pound Cake offers a lighter twist to the loaf cake while still providing that buttery flavor. Rather than heavy, this cake is soft and moist within so it will provide a delightful rush of lemon to the senses.
This recipe is one of our adaptations of the Lemon Bundt Cake and Lemon Poppy Seed Bread, and what is different about this recipe is the Lemon Glaze. Just like the NY Times Lemon Pound cake, this glaze serves to amplify the flavor and texture of the cake, making it hard to resist.
Ingredients Required
To make this mouth-watering gluten free lemon pound cake, please procure the following 12 ingredients:
Dairy free butter or butter
SugarLemon zest
Eggs
Vanilla extract
Gluten free all purpose flour with Xanthan Gum (GF Jules is recommended)
Baking powder
Baking soda
Salt
Sour cream
Fresh lemon juice for glaze
Confectioner’s sugar for the glaze
Step By Step How to Make Gluten-Free Lemon Pound Cake
- This one is easy! And we mean it, just follow these four simple steps to prepare the batterCream the butter with the sugar until the mixture is fluffy and light.
- Toss in the lemon zest, followed by the eggs and lastly add the vanilla extract.
- In a different bowl, mix together the gluten free flour, baking soda, powder and salt.
- Combine all the wet ingredients with the dry ones and rather than pouring everything into the bowl at the same time alternate between both until everything is mixed thoroughly
Your batter is ready! It should be thick yet smooth. Travel over to a pan that is floured and greased and spoon in the batter. Make sure to spread it evenly.
I prefer greasing and flouring the pan instead of parchment paper because with parchment paper, this cake doesn’t release as well after being baked.
Bake the cake for about 60 minutes, removing the cake from the oven once it has cooked halfway through and wrapping it in foil. This will allow the top of the cake to brown, but not become too dark.
The Lemon Glaze
Prepare the Lemon Glaze just before your gluten-free pound cake is done baking.
The superb flavor is created by pouring the glaze onto the baked cake as it comes out of the oven. This occlusive step enhances its absorption of lemon flavor while simultaneously ensuring the sugar doesn’t dissolve leaving behind a mouth-watering glossy look and brilliant citrus flavor.
Ingredients for the Lemon Glaze:
- Fresh lemon juice
- Confectioners’ (powdered) sugar
In a small crafting cup, whisk together the lemon juice and sugar. Glaze has a 50 percent ratio of lemon juice to sugar, meaning it is sweeter more fluid and less viscous than customary icing.
Applying the Lemon Glaze
When the cake is fully cooked take it out of the hot oven and pan it gently on a stove while being careful not to pour all the juices out of it. Now, while the cake is still in the pan take the glaze with lemon dressing and pour it generously onto the glazed top of the cake, while you will hear a slight simmering sound from the cake, that’s just perfect.
Allow the cake to cool for 15 minutes while still inside the pan. After, transfer it to a wire rack and generously apply more glaze to the top, sides and bottom of the cake. If you would like a more robust lemon taste, reapply the glaze again after 15 minutes has passed.
In any case, make certain to put extra glaze on the top of the cake as that is the part of the cake that gives it that shiny look.
Savoring your Gluten Free Lemon Pound Cake
Let the cake cool before slicing into it. With every bite you take, you will find that the lemon and buttery flavor is nicely balanced.
The texture is unreal – soft, moist, and perfectly crumbly without being dense. All of my taste testers went crazy for it and I am sure you will too!
Moist and Fluffy Gluten-Free Pound Cake
Course: DessertCuisine: AmericanDifficulty: Easy4
servings20
minutes1
hour300
kcalThis gluten-free pound cake is buttery, moist and lemony. It is also very easy to create. Above all, this gluten-free cake is optionally dairy free.
Ingredients
1/2 cup butter or dairy-free butter
scant 1 cup sugar by scant
1 teaspoon vanilla extract
1 tablespoon lemon zest (packed)
1 3/4 cups gluten-free all purpose flour with xanthan gum or 1 teaspoon baking powder
1/2 teaspoon baking soda
2 large eggs
2/3 cup sour cream or dairy-free sour cream
1/3 cup fresh lemon juice
1/3 cup confectioners (or powdered) sugar
1/2 teaspoon salt
Directions
- Place the oven at 350° Fahrenheit. Use some grease to coat an 8.5 inch baking pan, flour it, and set it aside for now.
- Blend the flour, salt, baking powder, and baking soda in a bowl. Then put it aside. A whisk, fork, or pastry cutter can help you out.
- Using a preheated mixing bowl, blend the butter with the sugar until they form a creamy mixture. This should take around 1 to 2 minutes.
- Now add the lemon zest and stir. Once you are done, add the eggs one by one while stirring after each addition. Do not forget to add the vanilla extract.
- Now add the sour cream and flour to the mixture, but do so gradually. Mix it until smooth and thick, but not impossible to spread.
- Now pour the batter into the greased pan and spread it evenly.
- Bake it for around 1 hour. Starting from the 30 minute mark, cover the top loosely using some foil so it doesn’t brown too much.
- Making the Lemon Glaze- Right before the cake turns out, take some powdered sugar and lemon juice and add it in a small bowl. It should turn smooth. It will turn out very thin. More like a juice than icing.
- When the cake is ready, the top should be brushed with a little lemon glaze while it’s still in the hot pan. Using a brush will make some of the glaze drip down the sides, allowing it to sizzle as it slowly melts. Bake it for an additional fifteen minutes and then remove the pan.
- Take the cake from the pan and rest it on a cooling rack. Drizzle glaze over the top, sides, and bottom, adding more after 15 minutes. By letting the cake soak in the additional glaze, you will enhance the lemony flavor and polish it’s outer look. However, make sure that the very least amount of glaze used over the top.
- After the cake has cooled completely, cut yourself a slice and dig in!.
- In terms of storage, wax paper and foil can be used to wrap the cake carefully, allowing it to be stored at room temperature for a maximum of 4 days.
Notes
- Greek yogurt can be substituted for sour cream if need be.
- To bring the eggs to room temperature, leave them for five minutes in a bowl of warm water. This assists in mixing and allows the cake to have a perfect texture.
